Cragmama "Not all who wander are lost…" JRR Tolkien

Meet Your Moment…a Giveaway from CLIF!

Enjoying a breathtaking nature moment in Spearfish Canyon this past summer.

We’ve all had “moments.”  Experiences where time stands still, the rest of the world stops, and everything else fades into the background as that one moment comes vividly into focus.  It could be something epic that you share with hundreds of people, or it could be something personal that’s just between you and your Maker.  It could be a tender family moment, or a loud, joyous occasion.  Some moments define who we are as a person, while others are just a nice reminder of why it’s good to be alive.  I have “moments” all the time when I’m climbing – like that giddy feeling that creeps in the minute I nail the crux on a hard route and realize that the send is mine for the taking so long as I keep my head together, or sensing how small I really am as I look out over a spectacular panoramic vista.  But I also have plenty of “moments” in the quiet of my own home, like when I snuggle Cragbaby to sleep every afternoon for his nap, or when we find bugs together in the backyard.  Moments like these are important because they cause us to realize that we are part of something bigger than ourselves.  Moments inspire us, give perspective, and often define our life’s path.  

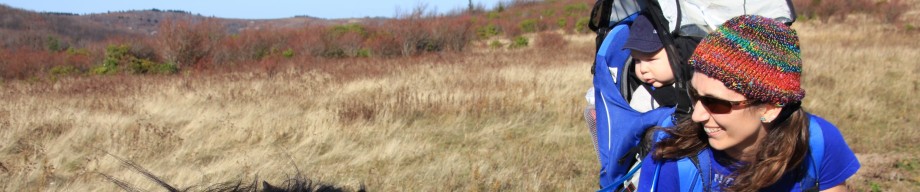
These two cool dudes are the people I love sharing my moments with most!

The wonderful folks over at Clif understand the magic of these moments, and are doing a really cool campaign that I am stoked to be a part of entitled “Meet the Moment.”  In their words, it’s “a call to arms, and legs, and lungs.”  Basically they’ve put up a site where folks like me and you can upload pictures that represent our “moments.”  You know, those photos that we put in frames or use as our screensavers because they take us to a different time and place whenever we look at them.  For every photo that is uploaded, Clif will donate $5 to one of 5 non-profit organizations that are dedicated to protecting outdoor spaces.  And climbers, one of the organizations is The Access Fund, so you should be ashamed of yourselves if you don’t participate, because this is an easy and painless way to send those folks some support!  Not only that, but Clif has agreed to giveaway a Clif prize pack to whichever “moment” garners the most likes/shares out of my readers (that’s you guys!) by the time the campaign ends on October 31st.  

Here’s how you can participate…

1.  Choose a photo that represents one of your “moments,” and click here to add it to Clif’s website.  You’ll get a chance to write a caption, and then choose which non-profit you want Clif to donate to.  
2.  Once your photo is uploaded, copy the URL and paste it in the comment field below this post.  (For example, here’s mine).  It would also be fun to give brief sum-up of the backstory of your moment in the comment field as well, but you don’t have to.
3.  Share your “moment” with your friends so they can like it, and be sure to peruse some of the other moments to like/share the ones you find most inspiring.  
4.  At the end of the  campaign, whoever has the most likes and shares from photos uploaded to this blog post will win a Clif prize pack.  

Easy enough, right?  The hard part will probably be choosing which moment to upload…although you can enter as many times as you like!  Happy uploading and I can’t wait to see everyone’s “moments!”  

Share

Road-Trippin’ with a Toddler – 10 Tips for Keeping Your Sanity

C jammied up and ready for a night-night flight to South Dakota

Unless you are lucky enough to have a world class climbing/hiking/camping destination in your backyard, odds are good that “getting there” (and back) will make up a significant portion of your itinerary.  This post is the toddler version of a post I wrote a year ago entitled “Making your Cragbaby a Good Car-baby.”  Back then Cragbaby was not quite 18 months…and now he’s a giant (comparatively) two and a half year old with bundles of energy oozing out of every part of him!  In some ways, car rides are easier now – he’s older and can entertain himself for longer.  He’s also facing forward in the car seat so there’s a lot more to look at and it’s easier for us to interact with him.  But in other ways, it’s a lot harder – namely because he hardly sleeps!  Well, at peak driving times that is.  Very rarely are we able to time a Friday afternoon drive to our weekend destination with a nap, which means several more hours of time to pass per trip! That being said, we’ve managed to figure out a pretty good system that not only makes long trips bearable, but many times even pleasant!

1.  TIMING:  Just because your toddler doesn’t take multiple naps per day anymore doesn’t mean you can’t try your best to coincide sleeping with driving. For example, we try to time our Sunday night returns from our weekend excursions with a gas/food stop somewhere in the vicinity of 8:00.  We then put C into his jammies, hop back in the car for a bit, and voila! a sleeping Cragbaby.

2.  BOOKS:  Books are a staple for any long drive, and often before a big one C and I will stock up at the library the day before.  It always seems like a new (to him anyway) book takes longer to read than an old one.

Just looking out the window can be pretty interesting – especially in new areas!

3.  MUSIC/DVDs:  Family sing-a-longs are always a blast!  I will admit however, that after the 45th round of the Veggie Tales theme song, we channel the sound to the back seat only…and speaking of Veggie Tales, we sometimes use our best dual screen portable dvd player for car as listening and watching song videos not only helps pass the time but also keeps the little one entertained. A hand-me-down from my parents, we only take out C’s “black computer” occasionally, but it’s been a life-saver on those 6+ hour rides. It’d be unfair of me to not mention the DVDs we’d taken along with us, which we were so gratefully apprised from https://www.crowsurvival.com/rv-accessories/.

4.  FOOD – Toddlers are slow eaters and they like to play with their food.  While this is not helpful on Monday morning before preschool, you can definitely work it to your advantage on a long car ride.  In a typical 3.5 hour car ride to the New River Gorge, C will spend at least a third of the time munching on nuts and raisins while crashing his toy airplane into the bowl on every 5th bite.

5.  BACKSEAT BUDDIES – Now that he’s facing forward and can see what’s going on, C is actually a pretty good highway companion – assigning him a list of items to spy out the window is fun for the whole family.  (Especially since C sometimes “sees” things that no one else can…).  Though it wasn’t always the case, nowadays we can usually make it to our final destination with both grown-ups still sitting in the front, but sometimes C gets lonely back there by himself, especially at night.  We don’t bring it up, but if he asks for one of us to sit with him, we oblige whenever we can.  I figure it won’t be too long until he’s in middle school and wouldn’t be caught dead asking to sit with his mommy, so I’ll enjoy it while I can :).

6.  STAY FLEXIBLE! – Even though he’s not a baby anymore (sigh), going with the flow and expecting the unexpected is still a given anytime children are involved, no matter the age.  Sometimes we can make it up to the New River Gorge in one stop.  Other times C announces loudly that there is a “poo poo inside” within 5 minutes of leaving the gas station.  But regardless of how long it takes, we always get there eventually, and we’ve learned to embrace the “getting there” just as much as the “we’re here!”

C in full on road trip mode on the way to Tennessee

7.  TALK IT UP:  Odds are good that you’re toddler is already looking forward to the final stop on your road trip.  But toddlers are pretty excitable little people, and it won’t take much to get your little guy or gal psyched on the travel component too.  Explain in advance what’s going to happen in kid-friendly language.  For example, instead of waiting until the day of and hopping in the car, you can build enthusiasm in advance by talking up the drive – “In 2 days we get to drive up to the mountains!  We’ll get on the highway, and drive past some farms where we can look for cows and horses, we’ll drive through tunnels and see how long we can hold our breath, and we can count all the bulldozers we see!”  If your child sees that you are psyched, he or she is likely to hop on the bandwagon.

8.  START SMALL:  If your toddler has never been in the car for more than the 30 minutes it takes to get to Grandma’s house, it’s best that your first outing not be a full day’s drive away.  If you know your travel time means that your child will be awake for the whole car ride, a destination 2 hours away might be plenty far enough, especially if you’re doing just a day or weekend trip.

9.  STICK WITH IT:  Toddlers love the predictability of routine.  If you haven’t traveled a lot, your youngster might balk at the idea of strapping into a car for the long haul.  If the first road trip attempt doesn’t go well, don’t give up!  Eventually you’ll get a “system” down that works for your family, and your child will have adopted a new “adventure routine” that they can look forward to again and again.

10.  JUST GET THERE:  Every now and then a road trip just sucks, and there’s nothing you can do about it but get there as fast as you can (safely of course!).  On these (hopefully rare!) occasions, just keep reminding yourself that despite the current tantrums, meltdowns, and frustrations, the drive/flight/train ride/etc will eventually be OVER and you will be at your destination, ready to overwrite the previous frustrations with more pleasant family memories.

How do you all keep your sanity (or do you even try?) on long trips?  What are the must-haves and must-do’s that your family swears by that I left out?  Please share!  

Share

H.I.T Hard, Crank Harder…

I’ve had a number of requests recently for some more posts about training, especially from fellow female climbers.  So it seemed fitting to share about my somewhat recent experiences with HIT Strips.  A little late, but better late than never!  HIT Strips, aka Hypergravity Isolation Training, are a training protocol developed nearly a decade ago by guru Eric Horst, author of numerous training for climbing books.  What prompted me to hop on the strips?  Summer in the Southeast, as you are probably aware, is not known for it’s sending conditions.  Heat and humidity is at an all-time high, causing both physical and mental energy to shrink to an all-time low.  Fortunately for us, we’d made plans to escape the summer doldrums with an excursion to the higher (and therefore cooler) ground of South Dakota and Wyoming.  

I wanted to feel strong on our trip, but logging outdoor mileage and maintaining psych was easier said than done.  In the weeks leading up to our trip, we were plagued by rain and heat indices above 100.  We managed to get out a few times, but conditions made it impossible to get much done, so I turned inward.  Not in a zen kind of way, but in a gym kind of way.  I’m fortunate to belong to a climbing gym that has a decent training area – campus board, hangboard, and of course, HIT strips.  Since the hangboard and I are still “seeing other people” after we couldn’t stay away from each other during my dark days in the boot, the Hit Strips were a novel new choice.  

Me, the HIT Strip Wall, a weight vest, and some bad lighting…

You can get a more detailed and scientific explanation of the HIT Strip concept from Eric’s training website here, but here’s the gist of it in layman’s terms.  Basically, for a training exercise to be most effective at increasing maximum grip strength, the following requirements need to be met  1.  High intensity throughout the exercise.  2.  Muscular failure reached quickly.  3.  Movement is climbing specific.  4.  Specific grip positions can be isolated.  Campus boards, hangboards, and bouldering intervals can meet some of these requisites, but only HIT Strips meet all 4.  

So how do you do it?

Easy.  Well, easy to understand that is.  Not so easy to do (which is the whole goal, right?).  The simple answer is that you just climb up and down the HIT Strip wall, until your muscles give out and you flop down on the pad.  Then you rest for exactly three minutes, and do it again.  Here are some specific guidelines.  

1.  Only work one grip at a time – so if you’re working an open-handed grip, for example, you climb up and down using only that grip.  

2.  Count your hand movements – you should be falling off between 15-20.  

3.  If you do more than 15-20 hand movements (on our wall that was 2 laps up and 2 laps down), add weight the next time you work that grip.  

4.  Write down your “stats.”  It’s tedious, but it’s the best way to track your progress, and the only way you’ll remember how much weight to add for your next session.  

5.  Start with your weaknesses first and end with your strongest.  For me (and a lot of other people), that meant starting with pinches and ending with open hand.  

Eric has a whole slew of other HIT Strips training tips here, so if you are considering incorporating this type of workout into your training regimen, I would highly suggest reading through it.  As for me, I didn’t do things exactly according to his instructions, but rather tailored them for what worked for my body and the time frame I had available.  I did 2 sessions of HIT per week for 4 weeks, so a total of 8 HIT sessions.  During this time I climbed outdoors some, but mostly easier stuff, and certainly no projecting, so that my body could have adequate time to rest and rebuild.  My last HIT session was a week before my trip, and for that week I just did some easy bouldering and/or ran laps on moderate terrain.

Of the 6 grips recommended by Horst, I only trained 4 – pinch, “2nd team” (index and middle finger), “1st team” (middle and ring), and open hand.  Being my first time trying the program, I didn’t feel comfortable using a crimp grip or “3rd team” (ring and pinky), as I wanted to make sure my tendons were ready to handle it.  Another time I might include it.  Each session I did 2 sets of one grip (separated by 3 min rest) before moving on to the next one.  I started out with no weight, but found that I very quickly needed to add weight (usually 3 pound increments) in order to produce failure in the ideal number of hand movements.  After my HIT Strip session, I would supplement my workout with 3 sets of 10-15 pull-ups, along with a couple of sets of an exercise on the hangboard I call “the campus traverse.”  (More on that later).  The whole she-bang (not including a 10 minute warm-up) took about 40 minutes.

The results?  I was shocked at how much progress I made from one session to the next.  I was adding weight left and right, and by the end of my training cycle, I had maxed out my weight vest (30 pounds) for everything but pinch grip.  Climbing with all of that extra weight was definitely a weird feeling (and also gave me flashbacks to my maternity days…).  As far as results on the rock go, I think I definitely felt more comfortable pulling for all I had on all those tweaky limestone pockets in Ten Sleep Canyon.  And as an unexpected bonus, all those countless laps on a 45 degree wall made me feel more at home on steep terrain as well.  I will admit that those 4 weeks got a little monotonous by the end, but it was a no-brainer way to squeeze in a quick (and efficient) workout into an often chaotic gym visit with a Cragbaby in tow.  I think next time it’ll be less boring and equally effective to follow the 2 weeks on, 2 weeks off routine that Eric suggests on his website.  

Has anyone else tried HIT Strips before?  What other sport-specific training is everyone into these days?  


Share

Toddlers and Helmets – From Bike to Crag…

C’s original helmet from Bell

My husband and I have always been fans of the brain bucket.  Climbing, biking, horseback riding, driving down I-77 during rush hour (one of these might be an exaggeration)…when it comes to adventures in the outdoors, many of our family photos involve a collage of hard hats.  In the climbing world, this sometimes makes us seem a little bit dorky – while there are some climbing situations where I don’t wear my helmet, 90% of the time I’ve got one on if I’m more than 15 feet off the ground (for a more detailed version of my helmet stance for climbing, check out here and here).

C trying out Mommy’s Trango helmet

For me the bottom line is that head trauma can have devastating and permanent consequences, and with so many risk factors outside of my control, wearing a helmet is a simple and easy way to buy a little bit of insurance.  It’s kind of a…”no-brainer” (cue boos from the bad joke police…).  With our strong stance on helmet usage, it’s no surprise that Cragbaby scored his first helmet as a Christmas present at 8 months old.  It was a kid’s helmet made by Bell, and was designed specifically for cycling. (or in C’s case, hitching a ride in his Chariot behind Mommy and Daddy’s bike).   C received a balance bike for his birthday when he turned 2 this past March, and from the beginning we made a hard and fast rule of “NO HELMET = NO BIKE.”  This meant that sometimes C went through weeks at a time where he didn’t ride his bike because of the whining that ensued every time we brought out the helmet.  (And ironically sometimes he would put away his bike after 5 minutes, but then leave the helmet on for another hour…you just never know with toddlers, I guess).  Anyway, we figure that the sooner he learns that helmets are synonymous with certain activities, the better.  

C and his brand new Petzl PICCHU

Now that he’s two and a half, Cragbaby is getting to the point where he is starting to climb outdoors a little bit (though he’s been dominating the walls at Inner Peaks for a while now).  That means we’ve had to add a third helmet to our entourage whenever we pack our gear for the typical weekend’s events.  And since C’s original bike helmet was on the outs (not sure how it got a giant crack across the front from nothing more than milling around the driveway on the balance bike…), we all of a sudden found ourselves in the market for both a cycling AND climbing helmet…

I don’t know about your family, but ours is into efficiency, especially when it comes to gear.  It’s a great feeling to be able to cross multiple to-do’s off your list from purchasing just one item.  So when I saw the PICCHU  helmet from Petzl, I knew it would be a good option for a multi-sport athlete like Cragbaby.  It’s one of the few climbing helmets on the market designed specifically for itty bitty noggins, and the only one that I could find that meets multiple safety standards for both climbing and cycling.  It’s intended to fit children 3-8 years old (C isn’t quite 3 but it still fits him just fine), which means, in theory, this one helmet should last us through any adventure life throws our way for the next 5 years…now that’s what I call efficiency!  

Just like Daddy!


C has decided that driving trucks is serious business and requires a helmet as well…

When he first saw it, he was a little unsure, as it didn’t look at all like his old (broken) standby.  “It’s scary, Mommy,” were his exact words.  But once I showed him that it was “just like Daddy’s,” he demanded to put it on right away, and ever since then it’s been the first thing he grabs when he goes into the garage.  Cragbaby likes the bright red color and the fact that it came with several pages of stickers to personalize his hard hat (although he’s chosen to put them on his sandbox cover instead…).  I like the fact that  it is easily adjustable for a wide range of head sizes and that it makes C look like a cute little toadstool.  But my favorite thing about it is the fact that C likes to have it on.  That tells me that it’s comfortable for him and doesn’t feel heavy or excessively hot on his head.  But most importantly, that tells me that the messages we’re sending C about the importance of safety are being received loud and clear!  

What are everyone else’s thoughts on helmets?  When, where, how, and why do you (or don’t you) use a helmet for yourself or your kiddo? 


Share

New River Gorge: The SEND Train has left the station…

Just after the bouldery start of Under the Milky Way (5.11d)

And I managed to hop on it this time.  (It’s about time…)

SEND TRAIN:  The extreme sending phenomenon that occurs when a group of climbers are projecting together and one person finally has a breakthrough – the rest of the crew feeds off of that psych, and all of a sudden everyone is crushing left and right.

In last week’s trip report I alluded to the fact that I had felt like I had been in somewhat of a climbing slump for the past few weeks.  It seemed like no matter how hard I tried, I was always coming up just a wee bit short..  We were originally going to stay home this weekend, but perfect weather (and the fact that I’d been so close the week before on Bullet the New Sky…) gave us an offer we couldn’t refuse.  We spent our first day at Summersville Lake, which is outrageously beautiful this time of year.  I never get tired of looking out behind me and seeing that view.  

Jesus is My License Plate (5.10d):  Pumpy little warm-up, with an exciting little finishing move. Under the Milky Way (5.11d):  This mega-classic arete was my only goal for today.  I’d never been on it, partly because it’s been a while since we’d been to the Lake, but mostly because I wanted to wait to get on it until I thought I would have a good chance to flash it (Non-climber’s note: a “flash” means that you led the climb with no falls or hangs on the rope the first time you try it – so obviously you only get once chance to flash a route).  The route consists of a really bouldery start to a small ledge where you can get a no hands rest – then it’s tippy tippy tip toe up a thin arete to an amazingly exposed finish on the prow.   I was psyched and ready to send until I saw my friend get man-handled by the start.  The beta he ended up using looked ridiculously hard, and I knew there was no way it would work for me.  I had my doubts when I tied in, but I managed to figure out some footwork that made the moves pretty secure and I blitzed through the opening section…until I got stonewalled trying to pull myself up onto the ledge for the no hands rest.  I kept traversing back and forth around the arete, desperately trying to figure out how to get my feet where my hands were.  I’m not really sure what the problem was other than the fact that my forearms felt like noodles – the holds are gigantic there, I just panicked and couldn’t get my body position right.  After a long time (literally almost 10 minutes) I finally groveled onto the ledge where I stayed for quite a while to de-pump.  The rest of the route was high-step heaven, and I savored every minute of it.  This is one I wouldn’t mind doing every time I come to Summersville.  

Bennett pocketing his way through the Direct start of Narcissus (5.12d)


Making the funky clip midway through Narcissus (5.12a)

 Narcissus (5.12a):  My friend Bennett was working on the direct (12d) version, and since he was in between burns and the draws were already up I decided I had nothing to lose so I hopped on.  Narcissus is a quintessential route at the New, and probably as anti-Cragmama in style as you can get, so it felt great to clip the chains, even though I hung on almost every bolt.  The bonus was that I felt really strong on it – linking it together would be a beast, but it actually felt within reach.  
Trigger Happy (5.10a):  I hopped on this at the end of the day because it looked like it’d be fun…and it was.  Big flakey jugs with some surprise slopers up top just to make sure you’re still awake.

Steve down low on Jesus is My License Plate (5.10d)


Steve, never w/o his water bottle, at the no hands rest on Discombobulated (5.11b)

Sunday morning dawned clear and COLD (38 degrees!) – absolutely perfect for Endless Wall.  I only had eyes for Bullet the New Sky (5.12b), Steve (aka the Crag-Daddoo) had plans to send Discombobulated (5.11b), and my friend Bennett wanted a go at Mississippi Burning (5.12b).  After a warm-up on Legacy (5.11a), I took an initial lap on Bullet.  I felt really confident going in – the first hard moves down low went off without a hitch, and I pulled through the crux and made the 5th clip without any trouble.  I had one more hard sequence to do before the rest of the climbing backed off to 5.11- or so for the last 40 feet.  Certainly not a gimme, especially with such generously spaced bolts, but I had it wired well enough that I knew once I got through the next few moves it should be in the bag…but for the life of me I couldn’t remember how to get through that next sequence.  I was starting to feel the pump settling into my forearms so I knew I needed to keep moving.  I slapped up the arete, fell, and then immediately saw the little (hidden) foothold I’d missed.  I took note of it, finished the route to dial in my beta some more, and then came back down to cheer on Steve.  

C with his new friend, “Buddy.” I’m not sure who is walking who…

No warm-up for Steve, he hopped on his project right out of the gate, and sent it in fine style, with what appeared from  below to be rather minimal effort.  And with that, the send train started boarding…the next run on Bullet the New Sky went perfectly for me as well as my friend Sam and some other folks that happened to be there too,  Bennett sent Mississippi on his next go, and my friend Matt had back to back flashes of both Legacy and Discombobulated.  Everyone left contented and satisfied – we’d each come with one or two specific goals in mind, and were able to cross off them all.  

And that’s the power of the send train…it’s entirely possible that one of these days one of us will get left out and be the only one that didn’t get their tick.  But it hasn’t happened yet – I think that’s because there’s value in the “communal psych” that builds with each person’s progressive success.  The concept is simple, but brilliant – when I see my friends do cool stuff I’m happy for them, and it motivates me to want to do cool things too.  The result?  Chugga chugga choo choo…Did anyone else take a ride on the send train this weekend?

This is how we all felt on Sunday night…

Share